Sunday, November 27, 2011

Christmas Time is Here!!

It is now "officially" Christmas time! I am so excited about all the new ideas I have for Christmas this year. I've already hung the Christmas countdown rings and wrapped the Christmas books for Lily to open one a day leading up to Christmas... and the ideas keep flowing! From my daughter's preschool class, Christmas parties and get togethers, I hope to have lots of excuses to use all the ideas and creativity flowing through my head. Here are a few of my recent projects to get Christmas started!

I tell ya, getting an active 8 month old to put his hand prints on anything is a challenge, I was happy to get his hand prints at the top of my canvas hand-print tree and that was a 2 person job! It turned out cute though. :)

Wednesday, November 16, 2011

Stationery card

Wishing You Merry Christmas Card
Custom Christmas cards are always available at Shutterfly.com.
View the entire collection of cards.

Monday, November 14, 2011

Lily's 3rd Birthday Flamingo Bash!

We had Lily's 3rd birthday at the zoo this year and wanting to go with a zoo theme and also keep it "girly", my wonderful husband (yes, I am actually going to credit you hun!) came up with the great idea to do it flamingo themed. I did most of my decor & invites using one pad of scrapbook paper & the "Life's a Beach" cricut cartridge. All the kids had a great time and I loved how it all turned out!

Thank you Sweet Treats by CC for the fantastic cake. She hand cut all the flamingo fondant pieces, find her on Facebook. :) 


Rice Krispie treats made with breakfast cereal, yum! :)

I had a flamingo craft for all the kids too! 


Tip Junkie handmade projects

Saturday, October 22, 2011

It's "Sew" Nice Out!

I've been doing a lot of sewing lately, as my friends and acquaintances start to think about the holidays, they think about needing some pretty dresses too. I love when a customer just tells me to pick something out, I try to find something new and try some new color combinations. Here are some of the dresses I've completed in the last couple of weeks.

Here is a dress for the fall & a Christmas dress for a one year old little girl. 

I loved this gingerbread fabric!

I also made 2 adorable Texan's dresses for twin girls. I am hoping their fabulous Mommy sends me some pictures of them wearing them tomorrow so I can show you guys how cute they turned out!

As always, if you need a dress for an occasion, feel free to email me

Sunday, October 9, 2011

Cupcakes & Carvings

I am in full fall mode, and loving all the different ideas on Pinterest for fall too! Yesterday we carved our pumpkin and I made some "candy corn" cupcakes.

I read an article about how after you gut the pumpkin, let it soak in water for 12+ hours and the pumpkin will last an additional 2 weeks so after I gutted the pumpkin and let it soak (and took a few pictures of my 7 month old in the pumpkin, ha!) we decided to try the cookie cutter approach on the pumpkin. We used a rubber mallet to cut out shapes in the pumpkin. It turned out really cute! Beware that you scoop out the lining pretty thin or it is tough to get the cookie cutter through. Also, we learned the hard way not to put the shapes too close as we had a little break in the pumpkin, but not too bad.

I also made some "candy corn" cupcakes for some friends who came over for dinner this weekend. Of course they are just made with white cake and white frosting, but look adorable. If I did them again I would make sure the orange was really dark as it came out really light orange. From the outside, you can't see the different dimensions but when you bit into it you can really see that it looks just like a candy corn! A great halloween treat.


Oh, and of course you wanted to see my baby in the pumpkin.


Saturday, October 8, 2011

Lily Crafts

I tried to think of a good name for some of the crafts I do for Lily's and I am so original that I thought I'd call them "Lily Crafts" ha.

I really want to have a way for Lily to look at pictures of her friends on a daily basis and remember certain moments of her life. I did the memo board thing, even took a lot of little frames and had them in her room but I think I finally found something that we both love. You all know I love unfinished frames and the endless possibilities so I took a few and painted them to match her new Ikea bookshelves (spice racks!). I did some mod podging of a few cut outs that represent Lily, stabled some ribbon on the back and hung them up! They are easy to change out pictures as often as possible and at a great height so Lily can look at her friends & family anytime she wants!


Also, my daughter loves spices, and she can reach the spice rack in the pantry and she always wants to play with the containers. As I emptied the diced garlic, garlic salt, fresh garlic (I really like garlic, but I'm kidding!) containers I saved them to make spice containers for Lily's play kitchen in her room. I washed them and removed the labeling, covered them with scrapbook paper and used packing tape to holding them in place. I filled them with paper pieces and glitter to give them a nice shaking noise but look pretty in the spice jar. I used packaging tape at the top, under the plastic so that no glitter can get out but Lily can unscrew the top or flip it open to make it seem like she is really adding something special to her concoction of plastic veggies! Of course I labeled them "Sugar", "Spice", "And Everything Nice...".


Friday, October 7, 2011

The T-Shirt Scarf

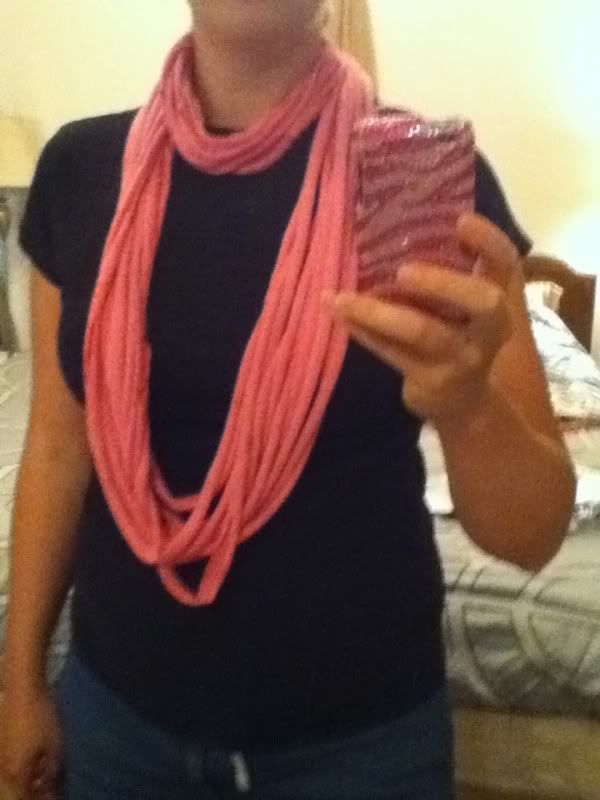
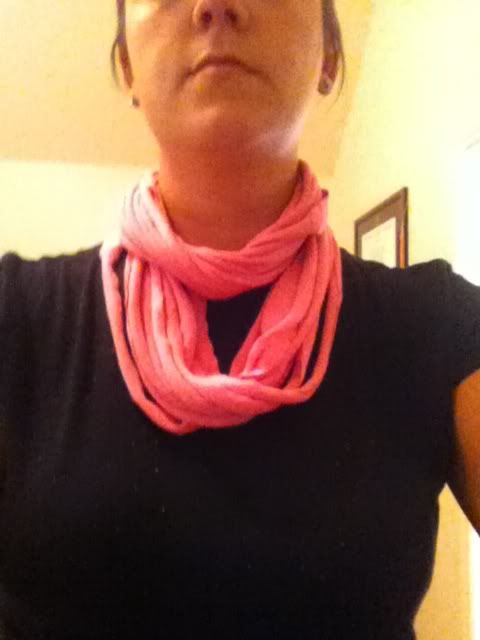
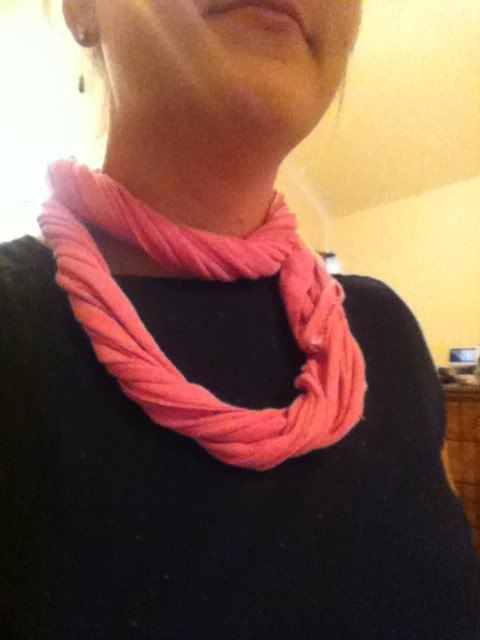
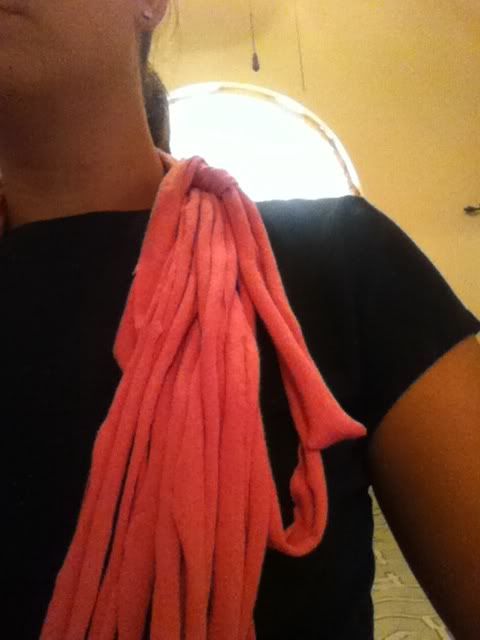
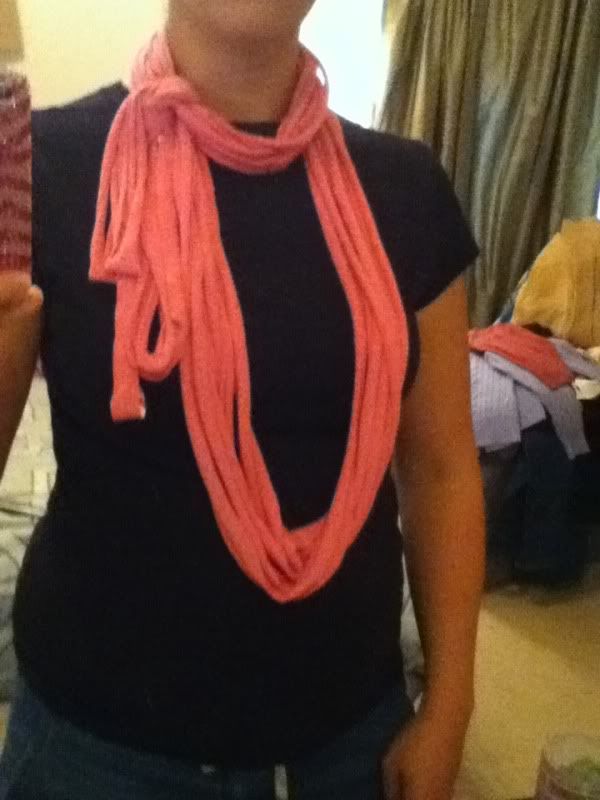
So, I'm sure we've all seen the pin or craft blog entry on the "T-shirt scarf" but today I decided to put on of the many methods to the test. I decided on a technique on Pinterest and went on the hunt for an old t-shirt. It was really easy to do, make sure your cuts are at least 1.5in wide cause they will break when tugged on. I also used the sleeves to cut smaller hoops, making a t-shirt necklace. I was going to utilize this old shirt! I played with different style methods for a good half hour, and there are a lot of options. I think I'll be doing this with lots of old shirts for the fall!

Here is the traditional look with the necklace (the sleeves) and the scarf (the shirt).

Here is just the scarf double looped to make a thicker necklace.
Here is the twisted look.

In this look, I used a few of the strands to tie a knot on the scarf to give it some flare.
And here is my favorite, the one I settled on and hung it up as in my closet. I have the necklace (the sleeves) on and the scarf (the shirt) and then tied them together with a few strands.What a great fashion accessory!


Related Posts with Thumbnails